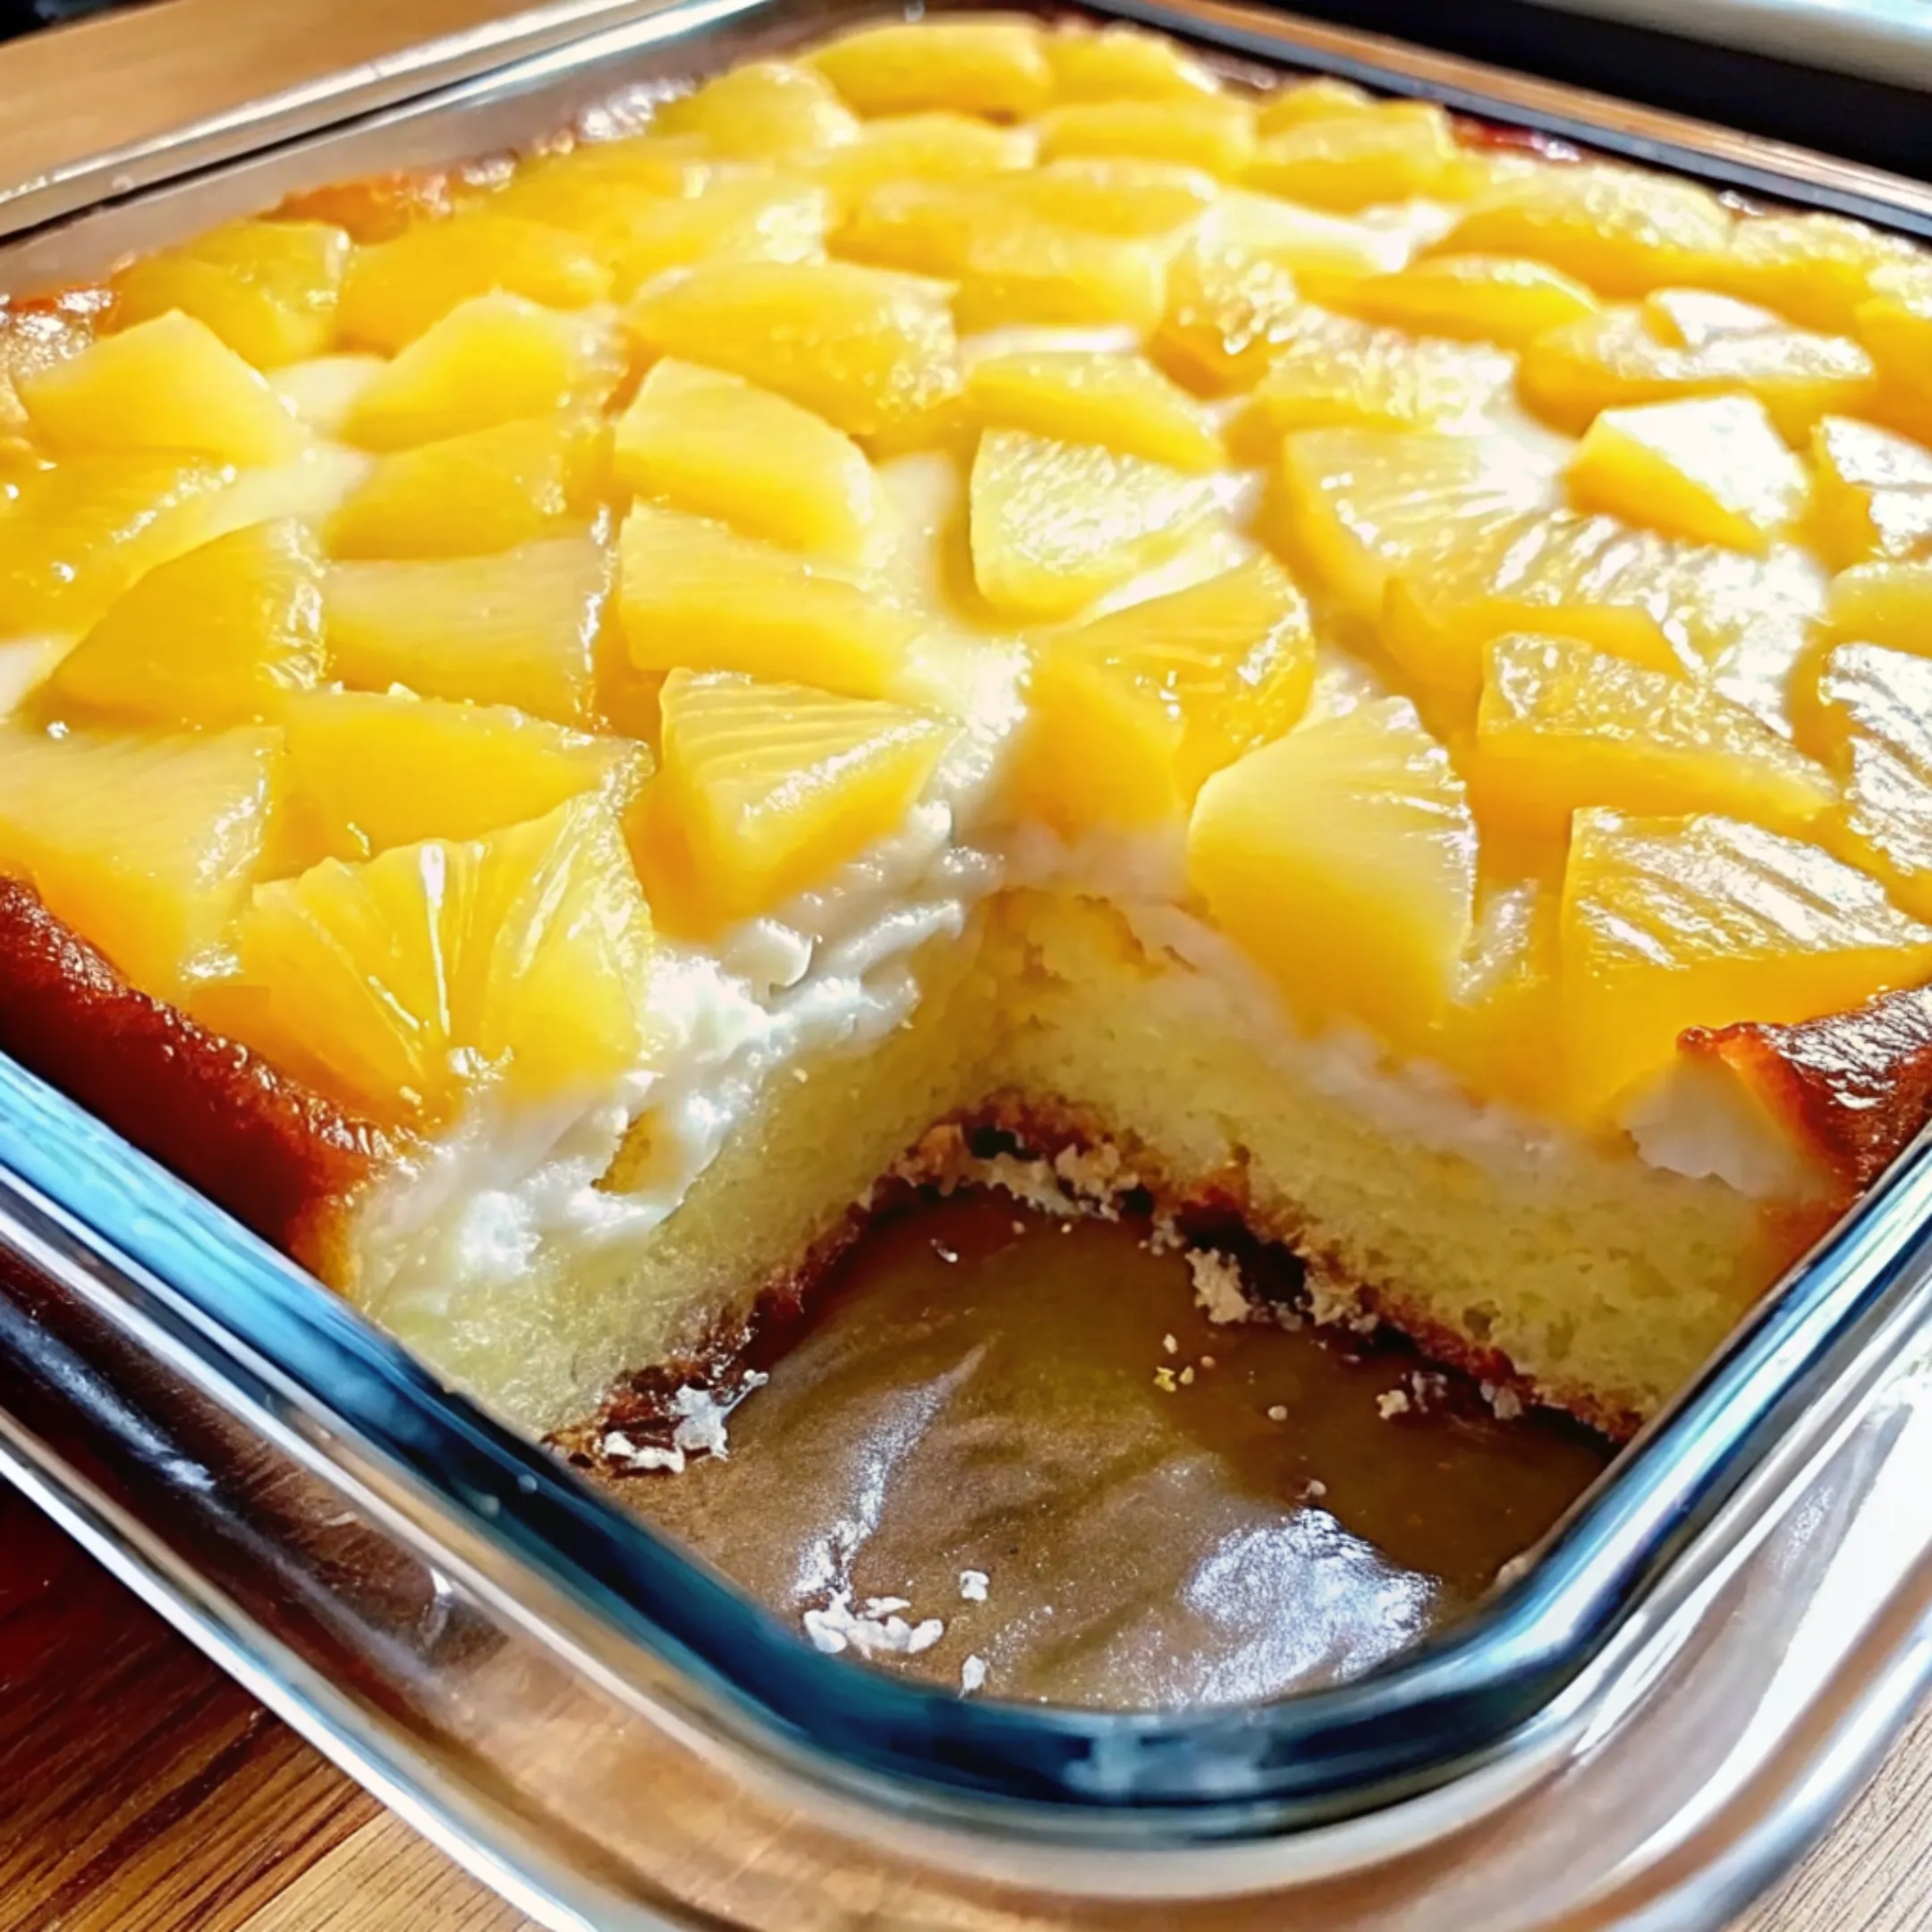
Last Tuesday afternoon, I found myself staring at three perfectly ripe pineapples from the market, wondering what magic I could create. My daughter Sophie had been begging for something special for her birthday celebration, and store-bought cakes just weren’t cutting it anymore. That’s when this Juicy Pineapple Heaven Cake was born in my kitchen—a moist, tropical masterpiece that’s become our family’s new favorite dessert.
This recipe combines the natural sweetness of fresh pineapple with a tender, buttery cake that practically melts in your mouth. What I love most is how the pineapple juice soaks into every layer, creating pockets of intense flavor that surprise you with each bite. If you’re looking for more tropical-inspired treats, you’ll definitely want to check out my coconut cream pie recipe for another crowd-pleaser.
Whether you’re celebrating a special occasion or simply craving something bright and delicious on a regular weekday, this cake delivers without requiring professional baking skills. Let’s get started.
Why You’ll Love This Recipe
- Incredibly moist texture thanks to fresh pineapple juice that keeps the cake tender for days
- Simple pantry ingredients you likely already have—no exotic items or specialty stores required
- Perfect for beginners with straightforward mixing and foolproof baking instructions
- Naturally sweet using pineapple sweetness to reduce added sugar content
- Impressive presentation that makes people think you spent hours decorating
Ingredients You’ll Need
For the Cake:
- 2 cups all-purpose flour
- 1½ cups granulated sugar
- ½ cup unsalted butter, softened
- 3 large eggs, room temperature
- 1 cup crushed pineapple with juice
- 1 teaspoon vanilla extract
- 2 teaspoons baking powder
- ½ teaspoon salt
- ½ cup whole milk
Why we use crushed pineapple: The small pieces distribute evenly and release moisture throughout baking. Best substitute: Canned pineapple works perfectly if fresh isn’t available.
For the Glaze:
- 1 cup powdered sugar
- 3 tablespoons fresh pineapple juice
- 1 tablespoon melted butter
Why pineapple juice in the glaze: It creates a tropical flavor that reinforces the cake’s main ingredient.
Step-by-Step Instructions
- Preheat your oven to 350°F (175°C) and grease a 9×13-inch baking pan. Line with parchment paper for easy removal later.
- Cream butter and sugar together in a large bowl for 3-4 minutes until light and fluffy. This incorporates air for a lighter texture.
- Add eggs one at a time, beating well after each addition. Room temperature eggs blend more smoothly without curdling the batter.
- Mix dry ingredients separately: combine flour, baking powder, and salt in a medium bowl to ensure even distribution throughout the cake.
- Alternate adding dry ingredients and milk to the butter mixture, beginning and ending with flour. This prevents overmixing which can make the cake tough.
- Fold in crushed pineapple gently with a spatula just until combined. If the batter looks slightly lumpy, it’s normal and will bake out beautifully.
- Pour batter into prepared pan and smooth the top with an offset spatula. Tap the pan gently to release any air bubbles.
- Bake for 35-40 minutes until a toothpick inserted in the center comes out clean. The top should be golden brown and spring back when touched.
- Cool in pan for 15 minutes, then transfer to a wire rack. This prevents the bottom from getting soggy while still warm.
- Whisk glaze ingredients together and drizzle over the warm cake. The warmth helps the glaze soak in slightly for extra moisture.
Serving Suggestions
This cake shines as a centerpiece dessert for summer barbecues and birthday parties—the tropical flavor feels like a celebration. Serve it slightly chilled with a dollop of whipped cream or vanilla ice cream for an indulgent contrast to the tangy pineapple.
For afternoon tea or brunch gatherings, cut smaller squares and dust with powdered sugar for an elegant presentation. The cake pairs beautifully with hot coffee or iced tea.
During Ramadan celebrations, this lighter dessert offers a refreshing option after heavy iftar meals. The natural fruit sweetness feels less overwhelming than rich chocolate cakes.
Variations and Suggestions (Make it Yours)
- Coconut lover’s version: Add 1 cup shredded coconut to the batter and toast coconut flakes for topping
- Gluten-free adaptation: Replace all-purpose flour with 1:1 gluten-free baking blend and add ½ teaspoon xanthan gum
- Reduced sugar option: Cut sugar to 1 cup and rely more on pineapple’s natural sweetness
- Cream cheese frosting twist: Skip the glaze and top with pineapple cream cheese frosting for extra richness
- Upside-down style: Arrange pineapple rings in the bottom of the pan before adding batter for a classic presentation
Emily Dawson Tips for Recipe Success
Don’t skip draining the pineapple partially: While we want the juice for moisture, too much liquid makes the batter runny. Drain about half the juice from crushed pineapple and save it for the glaze.
Room temperature ingredients are crucial: Cold eggs and milk can cause the butter to seize up and create a dense texture. Let them sit on the counter for 30 minutes before starting.
Test for doneness early: Every oven runs differently. Start checking at 32 minutes to avoid overbaking, which creates a dry cake despite all that pineapple moisture.
Common mistake to avoid: Overmixing after adding flour develops gluten and creates a tough, chewy cake. Mix just until you no longer see dry flour streaks.
For extra pineapple flavor: Brush each cake layer with 2 tablespoons of pineapple juice before glazing. This intensifies the tropical taste dramatically.
Storage and Make-Ahead
Store the glazed cake covered at room temperature for up to 2 days, or refrigerate for up to 5 days. The cake actually gets more moist as it sits because the pineapple juice continues to distribute throughout.
For freezing, wrap unfrosted cake layers individually in plastic wrap, then aluminum foil. Freeze for up to 3 months. Thaw overnight in the refrigerator and add glaze fresh before serving.
To restore the fresh-baked texture, warm individual slices in the microwave for 15-20 seconds. The glaze will soften and the cake will taste like it just came out of the oven.
Frequently Asked Questions
Can I use canned pineapple instead of fresh?
Absolutely! Canned crushed pineapple works wonderfully and is often more convenient. Just make sure to use the juice-packed variety rather than syrup-packed. Drain it slightly but reserve the juice for both the batter and glaze.
Why is my cake dense instead of fluffy?
The most common culprit is overmixing the batter after adding flour, which develops too much gluten. Mix just until combined, and make sure your baking powder is fresh—it loses potency after 6 months.
Can I make this as a layer cake instead of sheet cake?
Yes! Divide the batter between two 9-inch round pans and reduce baking time to 25-30 minutes. This creates a beautiful layer cake perfect for special occasions with frosting between the layers.
How do I know when the cake is perfectly done?
Insert a toothpick into the center—it should come out with just a few moist crumbs, not wet batter. The top should spring back when lightly pressed. Start checking at 32 minutes to avoid overbaking.
Can I make this dairy-free?
Replace butter with coconut oil and use almond milk or oat milk instead of regular milk. The texture will be slightly different but still delicious with a subtle coconut undertone that complements the pineapple.
Does this cake need to be refrigerated?
Not if you’ll eat it within 2 days. The sugar content preserves it well at room temperature. However, refrigeration extends shelf life to 5 days and some people prefer the denser, chilled texture.
Final Thoughts
This Juicy Pineapple Heaven Cake has earned its permanent spot in my recipe rotation, and I hope it becomes one of your favorites too. The combination of moist, tender crumb and bright tropical flavor makes it special enough for celebrations yet simple enough for weeknight baking.
I’d love to hear how your cake turns out! Did you try any of the variations? What occasion did you bake it for? Share your experience in the comments below or tag me on social media—I always enjoy seeing your beautiful creations.